How to quickly setup and use this theme.
In order to install the theme, you have two options:
Appearance > Themes. Here, you should see a thumbnail of Merchant theme.You will be promted in the WordPress Dashboard to install theme required plugins. Follow the prompts to install them.

Demo content has been included in your download to make it easier to set up the theme. It is of course completely optional.
Go to Tools/Import and install the WordPress importer plugin. You can then use it to upload the included merchant-demo.xml file.
Note: - Make sure you have installed the required plugins before importing the demo content.
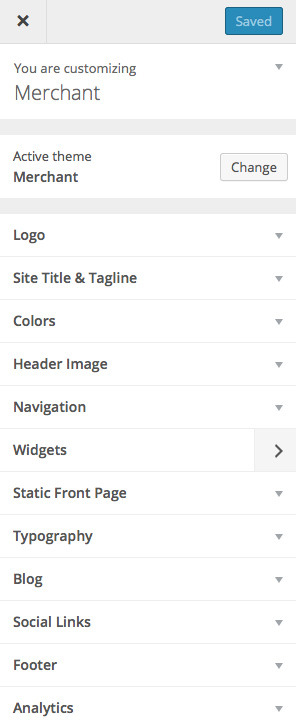
This theme features advanced customization features with live preview. Click on 'appearance/customize' to open the customizer.
ColorsHighlight colors of the theme can be set.
LogosYou can upload a header logo.
Header ImageSet a sitewide custom header image. The header image is shown on pages using the 'default' template
Note: - You can overide the header image on individual pages.
Blog LayoutSelect one of 2 sitewide blog layouts.
TypographySelect from Google fonts included. You can toggle default fint settings on to return to the demo font setup.
Social LinksAdd your social links. Any fields with values entered will automatically display the social icon in the footer on the frontend.

This theme has two menu areas. A custom 'mega menu' which lives at the top of pages (primary menu). And a footer menu.
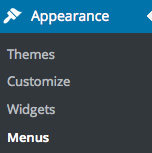
Appearance > MenusAppearance > CustomizeNote: - In Appearance > Menus you can click on the options tab(top right) to add 'categories, products etc.' to menu options.
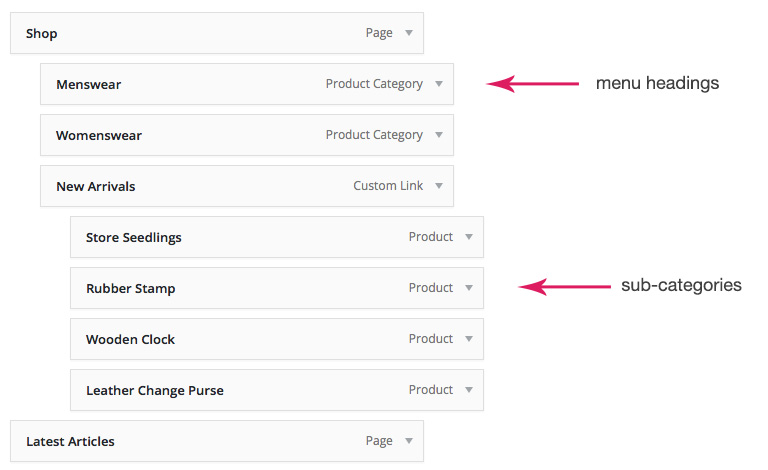
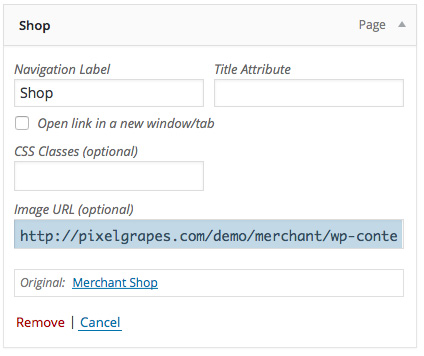
There is an optional 'image URL' field for each menu item. Top level menu item images display as the large drop-down image (left side of menu). To add a menu image just grab the image URL from your media menu.
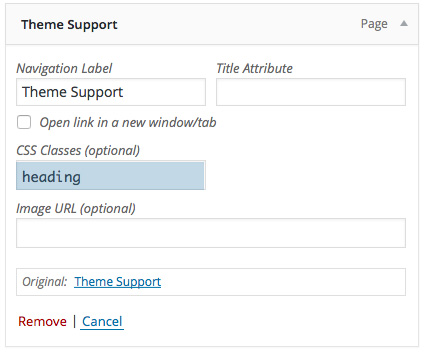
You can organize your sub-menus by adding headings. To add a heading simply add a 'custom-link' from the menu options. After the item is added you can remove the 'URL' field. Then add the class 'heading' to your menu item. Now you will have a nice bold heading.
Note: - If the 'class' field is not visible you can click on the 'screen options' tab (top right of screen) and check the 'CSS Classes' box.

To add a highlight tag simply add the appropriate class to the menu item.
Available Tags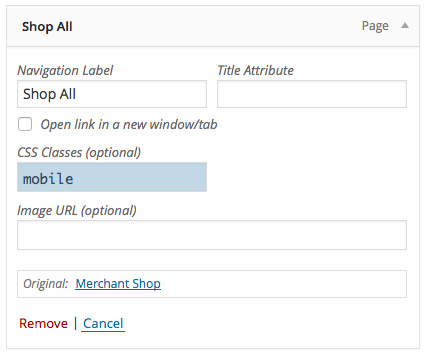
You can make menu items only visible on mobile devices. To do this, add the 'mobile' class to the menu item. This is useful to add top-level menu items to the (mega-menu) drop-down on mobile devices so they are 'clickable'.
Note: - This is the menu icon in the top right corner of the demo which drop down from the top of the screen.
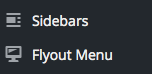
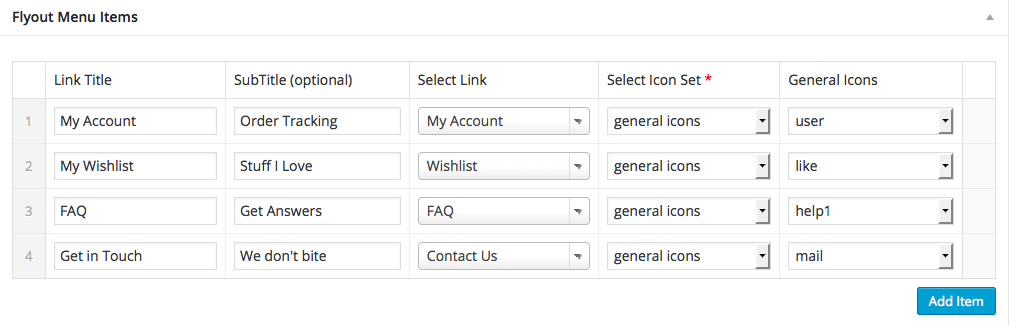
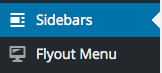
Select the 'Flyout Menu' menu option from WordPress admin. You can then click on 'add item' to add icons/links to your menu.
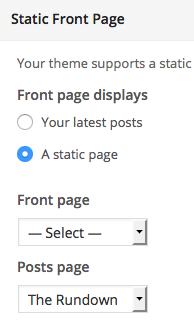
'appearance/customize' and select the 'Static Front Page' tab. Set the 'Front page'.'appearance/customize' and select the 'Static Front Page' tab. Set the 'Posts page'.Note: - To set the same page as your homepage and main posts page, simply set the "Posts Page" to your desired page and leave the "Front Page" selection as the default -select-.
Merchant features dynamic sidebars (and footers). Select the 'Sidebars' menu to create new sidebars. The sidebars will magically appear in Appearance > Widgets. Now in pages/posts you can select any of your sidebars from the dropdown. Or leave it to display the 'default' sidebar. You can also create new footer areas as well.
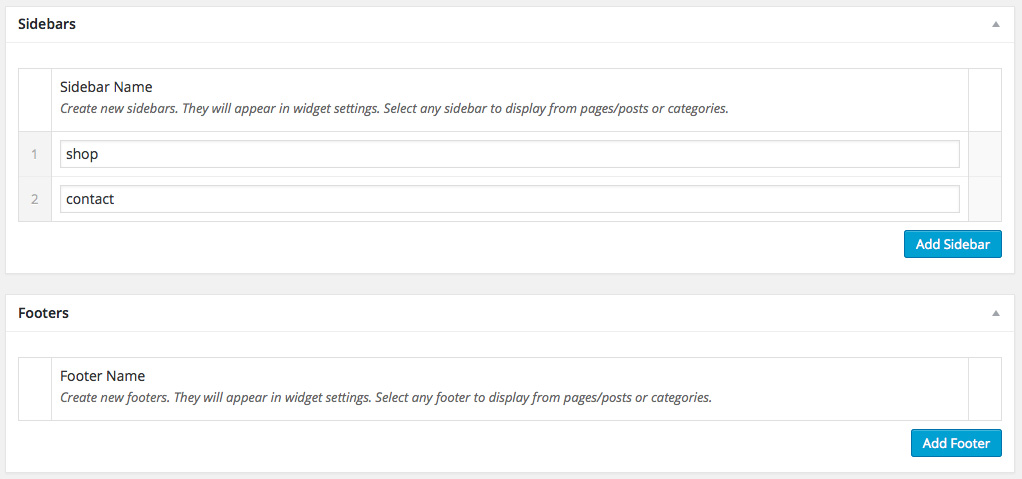
Note: - You can also delete sidebars.
Footer Sign-up Form: The demo has a sign-up form in the footer. This uses the 'Mailchimp for Wordpress' free plugin. It allows you to create custom forms. Here is the form code used in the demo:
<figure class="amp-ad-hover"><div class="img-holder" href="">
<img width="577" height="500" alt="" class="attachment-mer-ad" src="path_to_image">
<span>
<input type="email" id="mc4wp_email" name="EMAIL" placeholder="Your email address" required />
<p><input type="submit" value="Sign up" /></p>
</span>
</div>
</figure>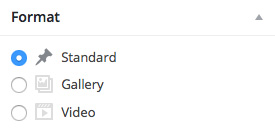
The Merchant theme supports several post formats. You can select 'gallery', 'quote', 'audio', 'video' or standard post format from the raio list on the right.
When you click the desired post format the post entry fields will change.
This is a regular post. You can anter a 'featured image' to display above the post.
The Merchant takes full advantage of Category features.
In appearance/menus you will want to click on the 'options' tab (top right corner) and make sure the 'categories' box is checked. Now you can add categories directly to the menu.
Click on 'posts/categories' or 'products/categories' to create new categories. You will notice in this theme categories support custom page headers, splash intros and menu images. This gives you tremendous flexibility when setting up your site navigation.
The Merchant theme doesn't use standard page templates. Instead we have included more 'in-page' options for added flexibility.
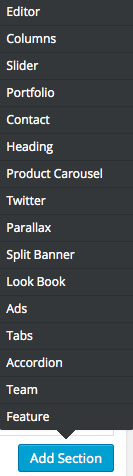
This theme includes simple 'page builder' sections which allow you to quickly layout pages.
When you create a new page or post you will notice the 'layout' section. Simply click on the 'add row' button from the bottom right to pull up the sections menu. Simply select the section you would like to add.
Note: - The 'editor'section pulls up the main WordPress content editor.
Note: - Drag & Drop sections to reorder them. Or hover over the right edge to delete them.
Every page, post and category has fields to add custom headers images. This custom header will overide the default header image set in appearance/customize.
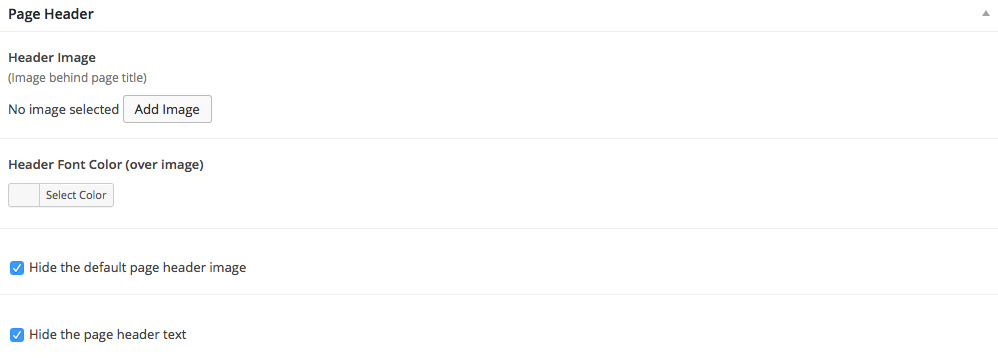
Note: - header images are best at 1900px + wide.
Every page, post and category has fields to add a splash intro. This is the large full page image seen before scrolling down the page.
The page title will display over the spash image. Or you can 'hide' the title/subtile.
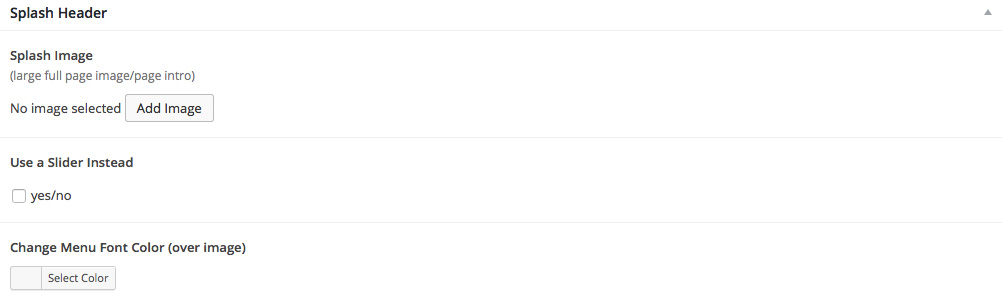
Note: - splash images are full screen so they should be large in dimension, but try to keep the file size down so they load quickly.
From the 'Splash Header' section you can opt to 'Use a Slider instead' of a static image. You can simply select one of your created sliders from the dopdown.

Note: - You must have created at least one slider first in Revolution Slider settings.
You can select up to three product category sublinks by their titles (dropdown options) to be displayed below the page title. If you are editing the 'blog' page, you can add blog category sublinks. These can appear in the page header if present, or over the large 'splash' image.

Note: - you can drag and drop the sublinks to change the order.
You can select any custom sidebar or footer from the available dropdowns. See 'Sidebar & Widget' section above to create new sidebars/footers.
You can create a child theme to add custom css. See more here.
The theme includes sets of icons which can be used in some page builder sections.
Social Links
Add your social links in appearance/customize under the 'social' tab. Any links you have entered will be automatically added to the site footer.