

How to quickly setup and use this theme.
In order to install the theme, you have two options:
Appearance > Themes. Here, you should see a thumbnail of method theme.Begin installing plugins.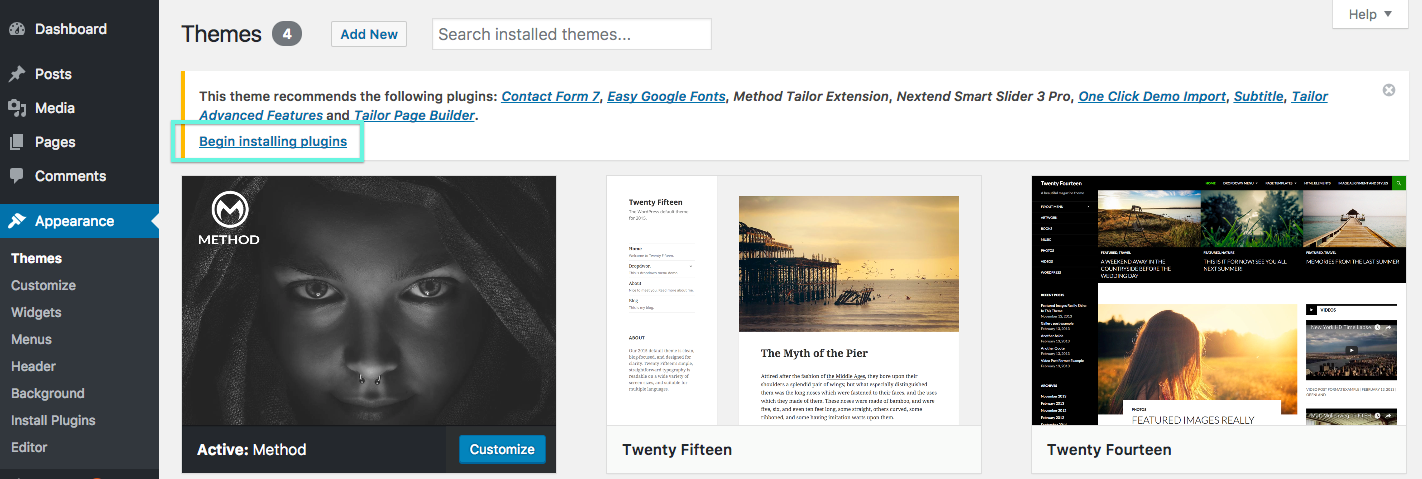
install. Then click Apply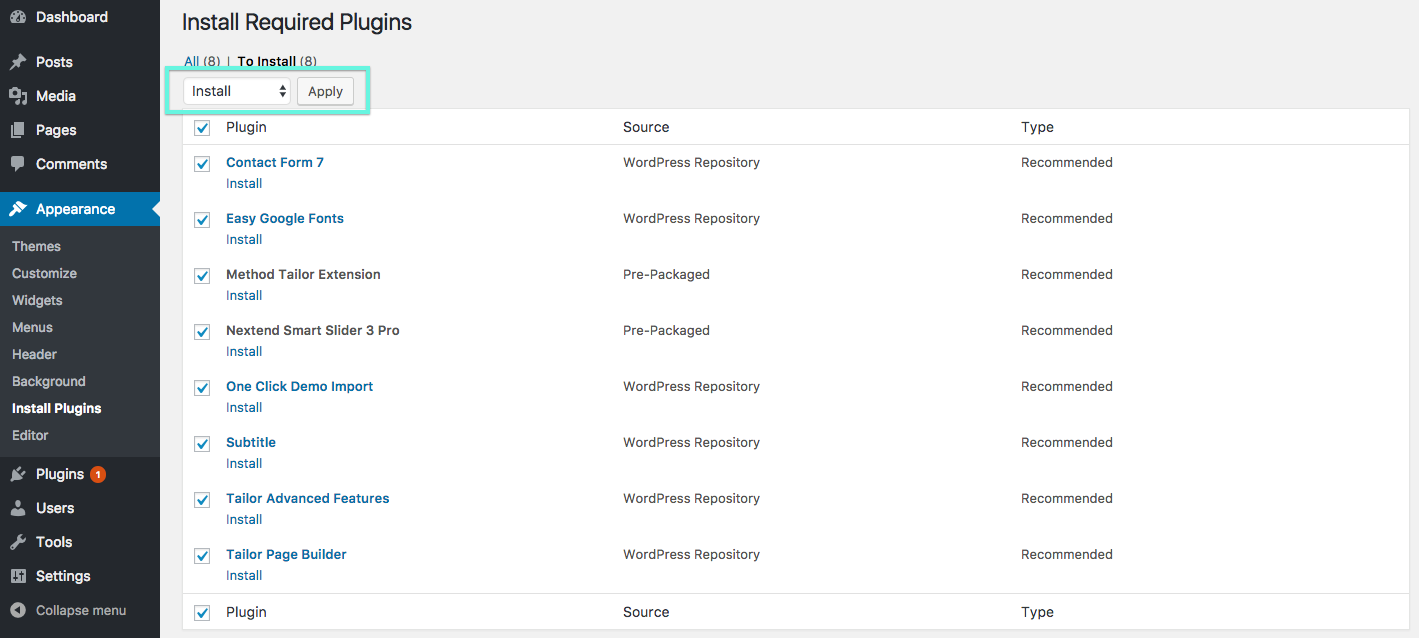
The theme includes 2 icon sets which can be used in some page builder sections.
To add a new icon kits:
Settings/Tailor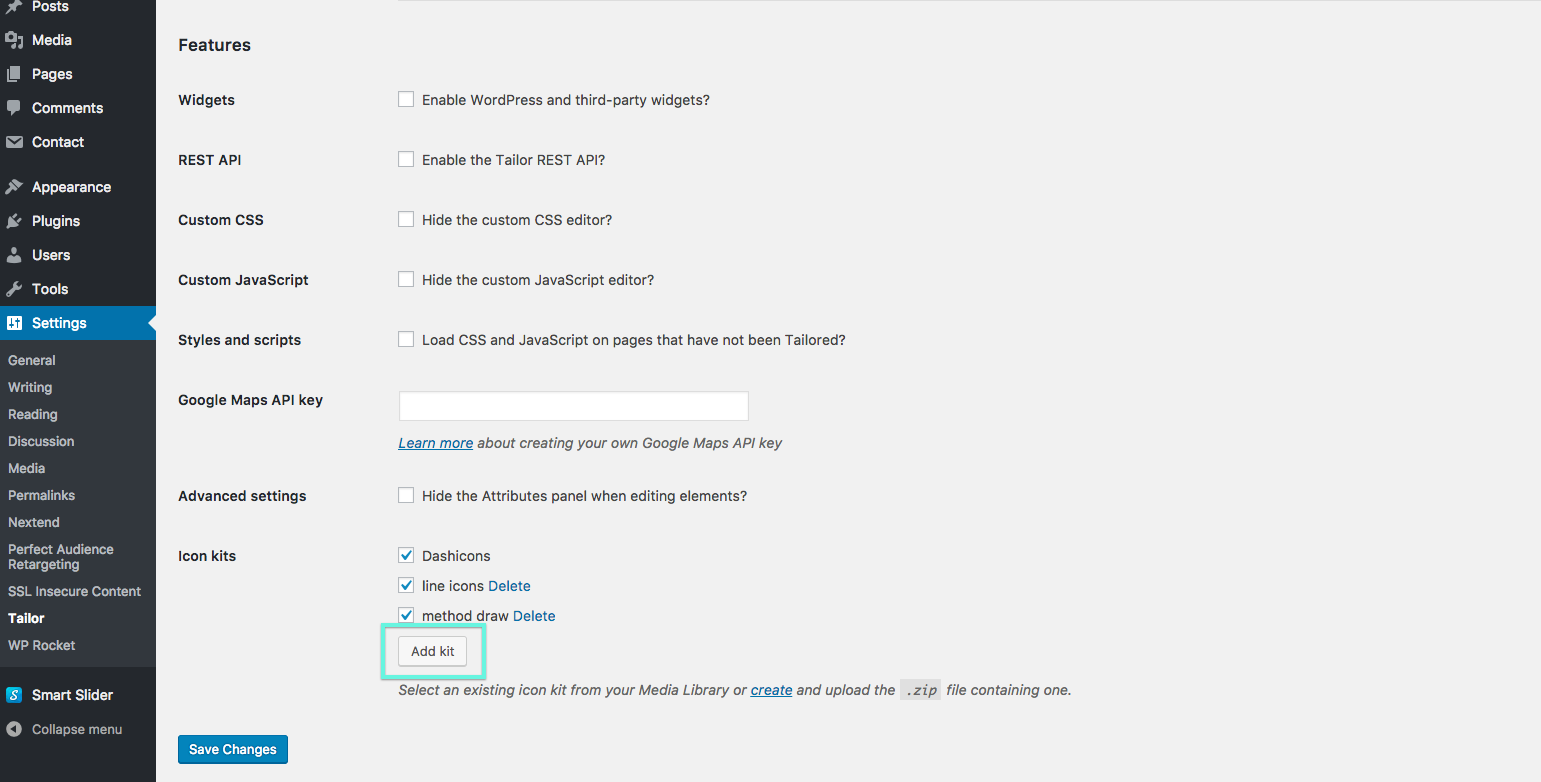
Note: - Additional icon kits can be created using the Icomoon tool.
Note: - Icon kits can be deactivated or, in the case of custom icon kits, deleted.
Demo content has been included in your download to make it easier to set up the theme. It is of course completely optional.
Go to Appearance/Import Demo Data.
Note: - Make sure you have installed the required plugins before importing the demo content.
Select a demo to install. (You may be promted to install additional plugins first.)
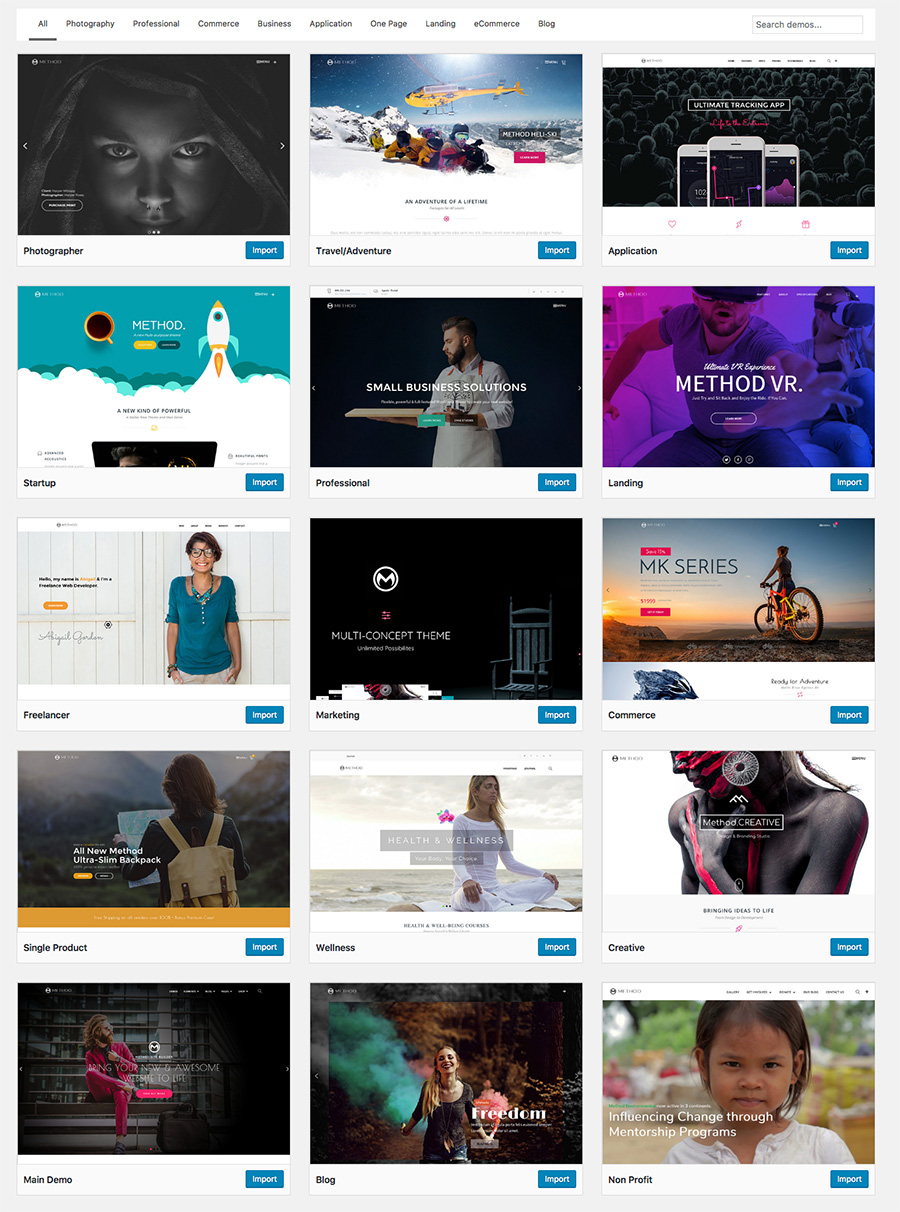
Note: - The Main Demo and Non-Profit demos featue a mega menu & require it to be activated. *See Menu Setup
Hint: - If you install a demo and then decide you wanted a different one you can use a WordPress reset plugin to start fresh.
This theme features advanced customization features with live preview. Click on 'appearance/customize' to open the customizer.
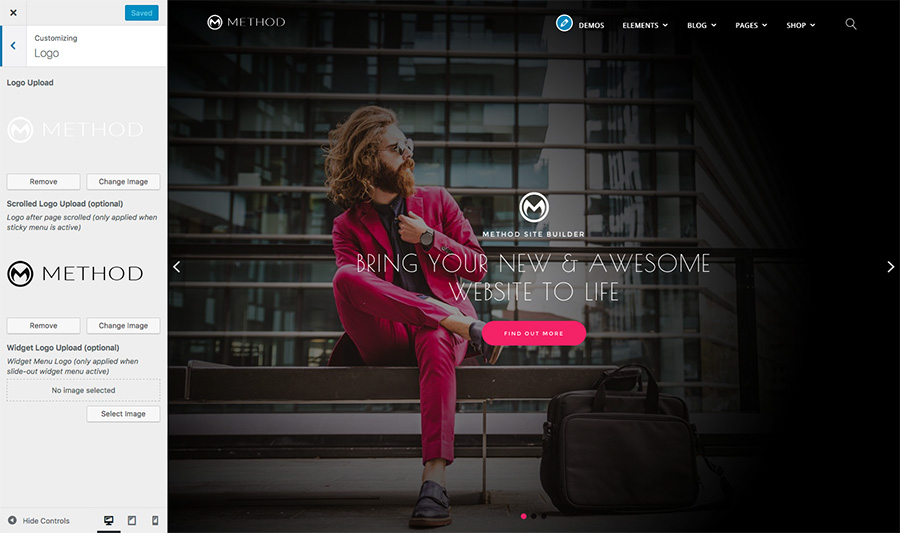
In appearance/customize/logo you can upload your main logo. You will notice there are also upload fields for a scrolled logo & a widget logo.
You can upload a scrolled logo if you want the logo image or color to change when the page is scrolled
Note: - The scrolled logo is only used when a 'sticky header' layout is applied.
The widget logo adds a logo to the 'slide-out' widget area.
Note: - See more about the 'slide-out' widget area in the sidebar section.
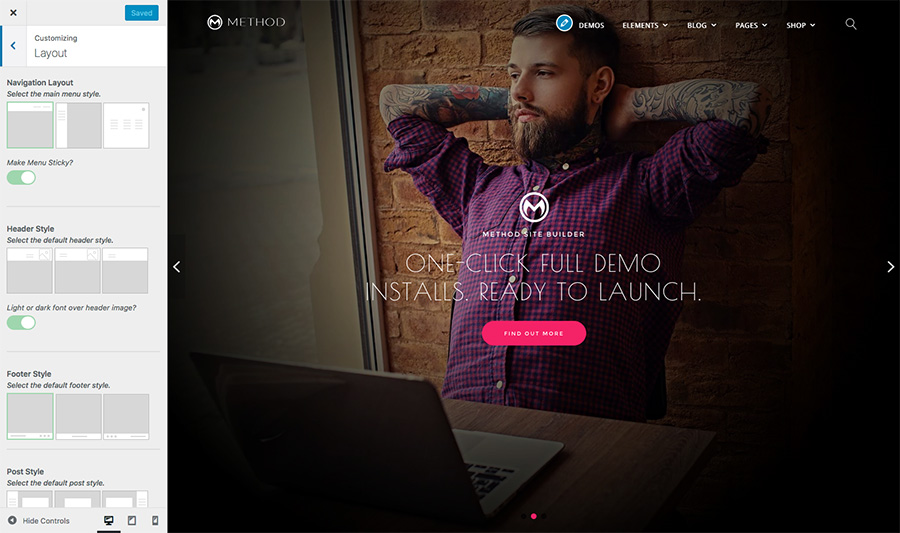
You can set the navigation stlye, header style, footer style and single post layout style.
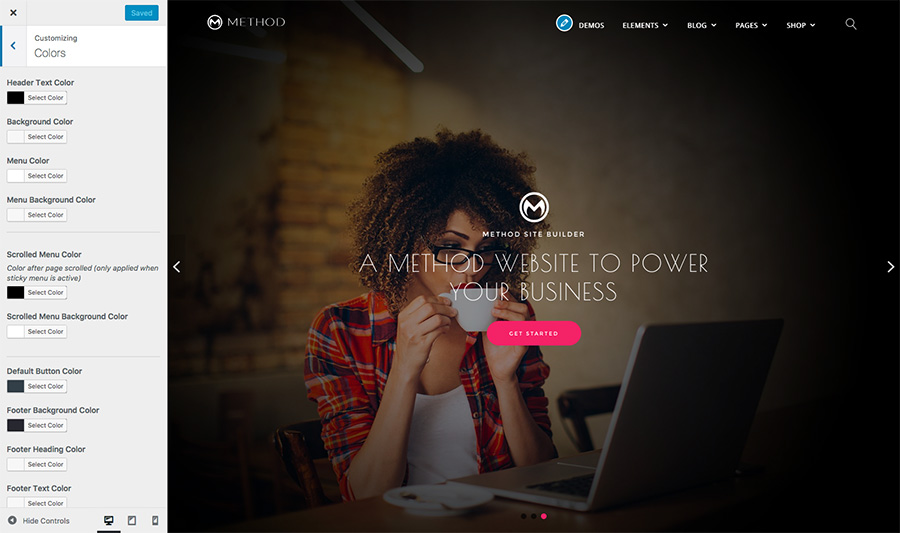
Set global theme colors.
Note: - You can overide some of the color setting from within individual page settings.
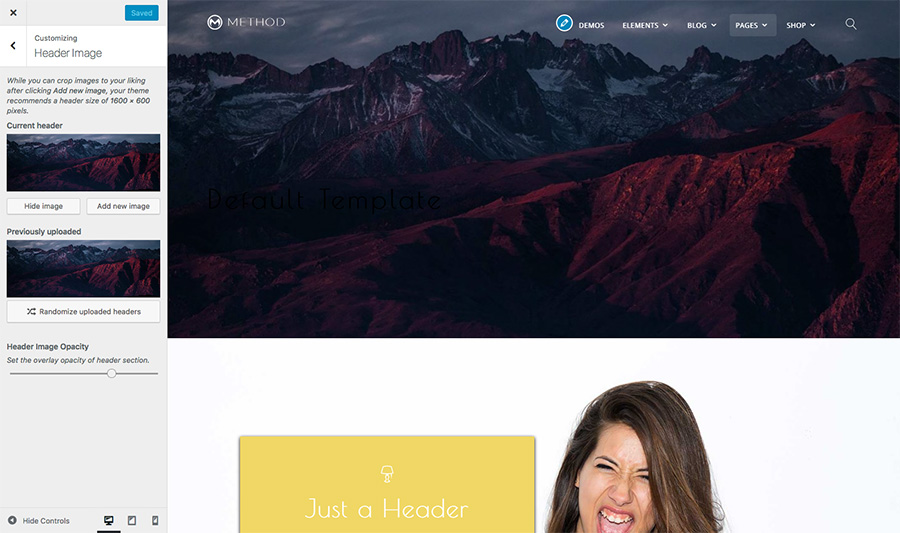
Upload a default header image
Note: - You can overide the header image from within some individual page settings.
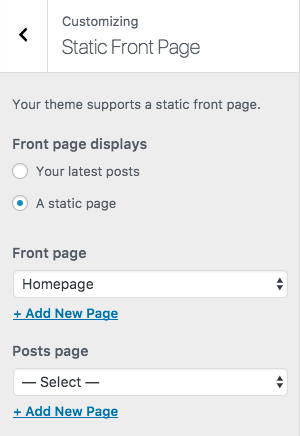
'appearance/customize' and select the 'Static Front Page' tab. Set the 'Front page'.'appearance/customize' and select the 'Static Front Page' tab. Set the 'Posts page'.Note: - To use a custom blog page, leave the "posts page" setting unset.
Note: - To set the same page as your homepage and main posts page, simply set the "Posts Page" to your desired page and leave the "Front Page" selection unset.
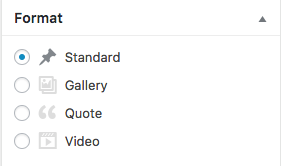
The method theme supports several post formats. You can select 'gallery', 'video', 'quote' or standard post format from the radio list on the right.
This is a regular post. You can enter a 'featured image' to display for the post.
Note: - The feature image is used on blog pages. If you want to set a different header go to settings/general from within the page builder.
excerpt field.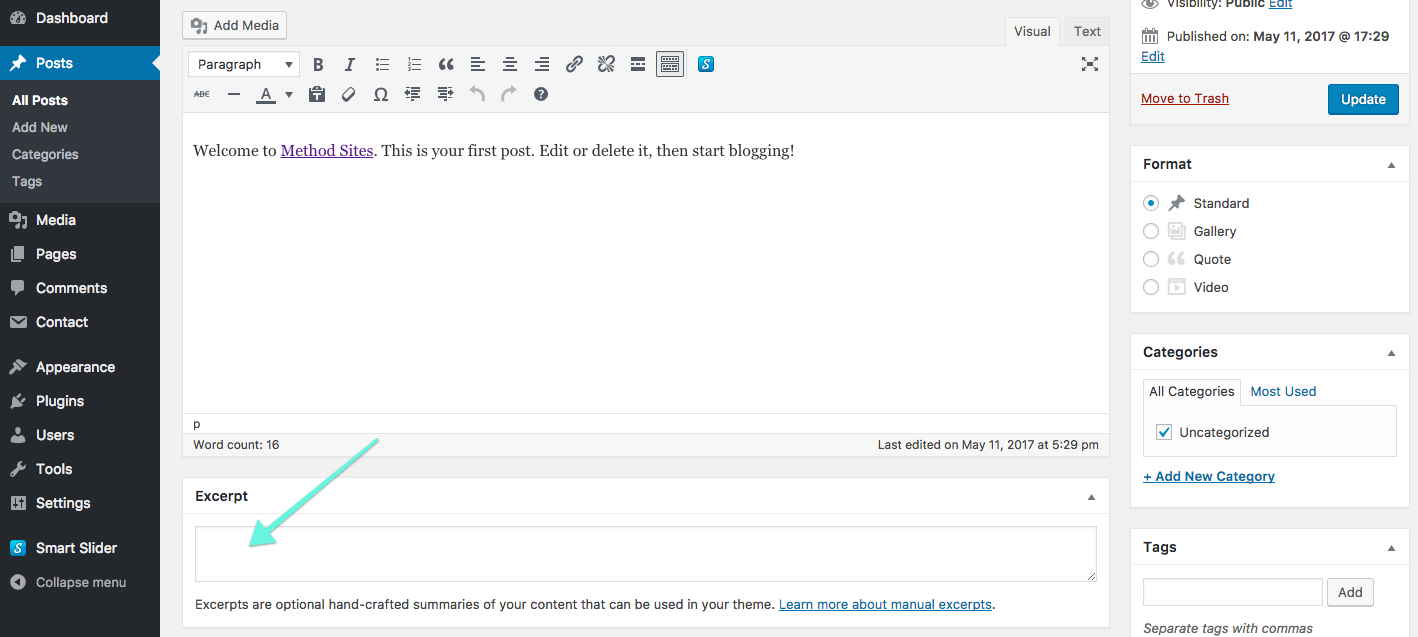

You can add widgets to the sidebar in Appearance > Widgets.
Note: - The theme sports 3 widget areas. In the footer, on blog posts & a slide out Menu Sidebar widget area.
The right slide out menu sidebar will only be present if widgets are added to it in appearance/widgets.
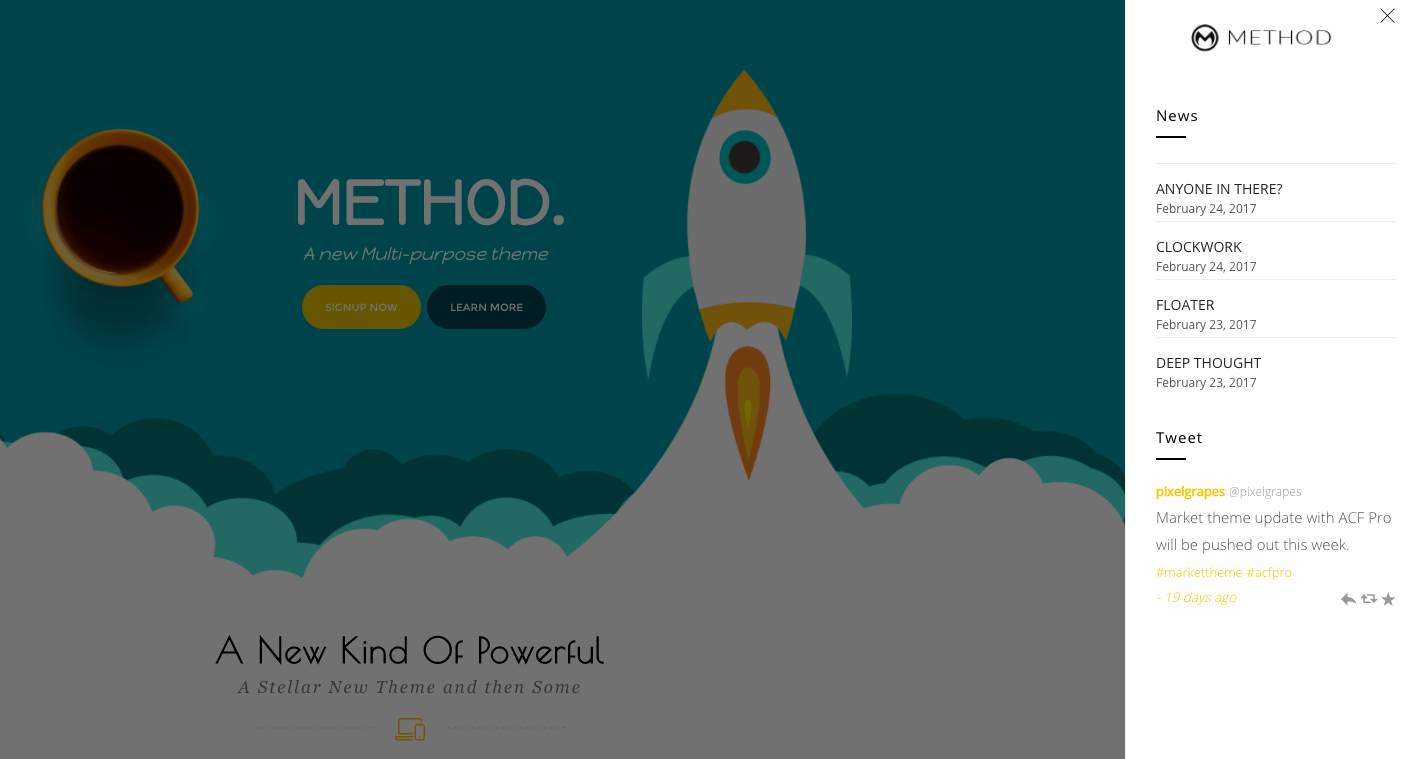
Note: - Additional widget sections can be added to pages via the page builder.
This theme adds custom elements to the intuitive 'Tailor Page Builder' plugin which allow you to quickly layout pages.
Note: - You must create and save a new page first. You can then launch the page builder
To launch the page builder click on 'Tailor this Page' from the WordPress admin bar or from within a page or post.
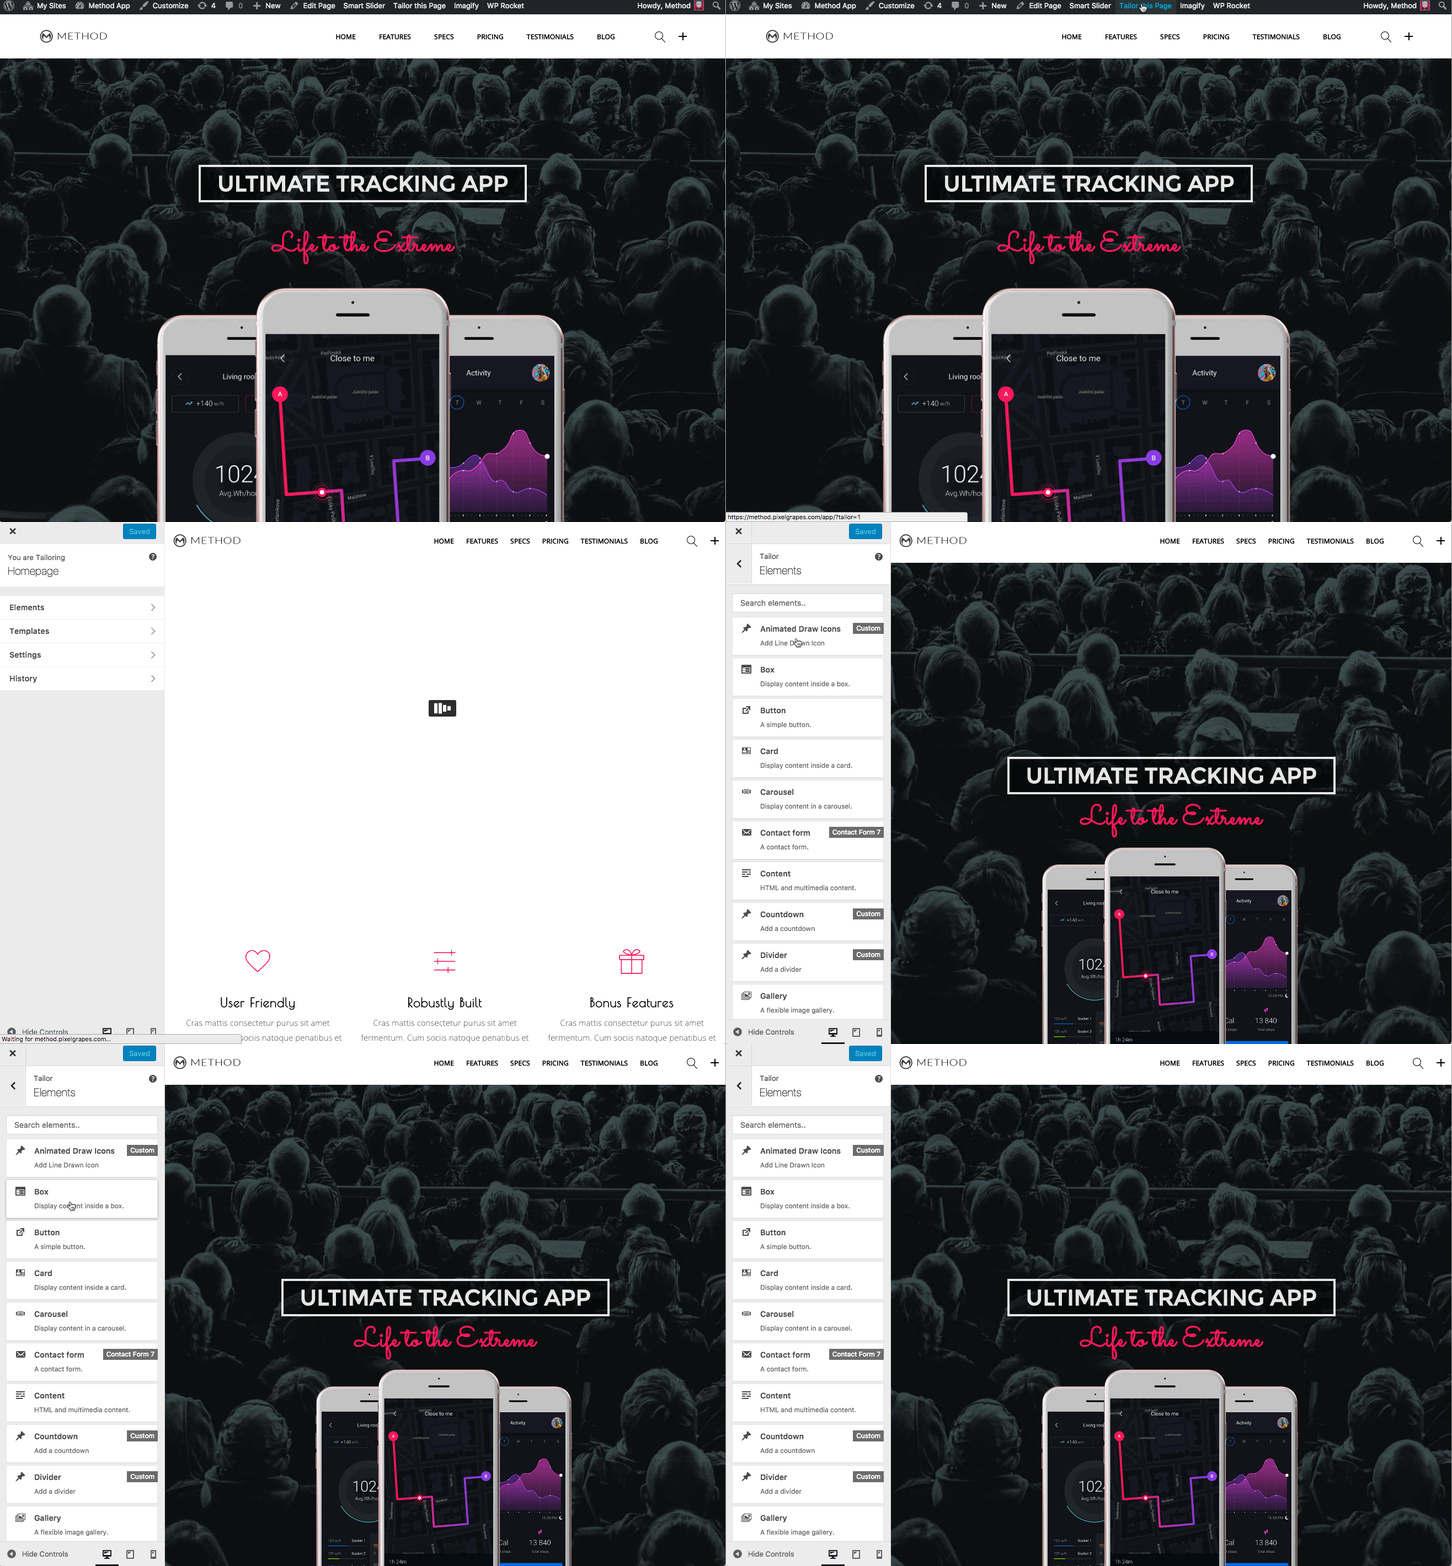
To add an element to the page, simply drag it from the element list onto the canvas.
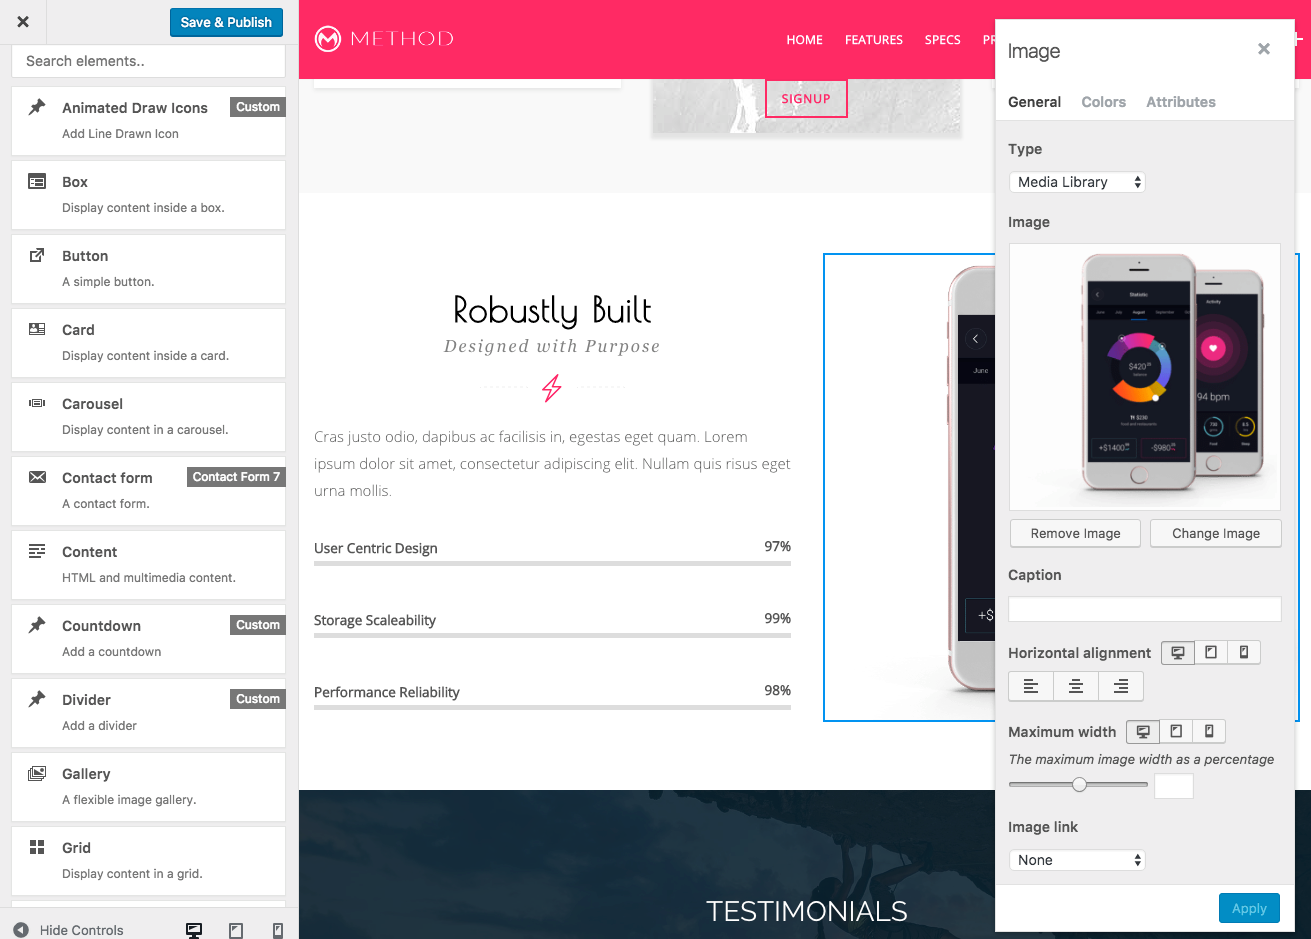
Containers have special child elements. For example, to add another tab to the Tabs container element, drag an element from the element list onto the middle of the container.
To create a row/column structure, simply drag an element from the element list onto the page to the left or right of an existing element. That existing element could be a column within a row. To resize columns, drag the handle between the two columns you wish to resize (the mouse cursor will change to indicate horizontal dragging).
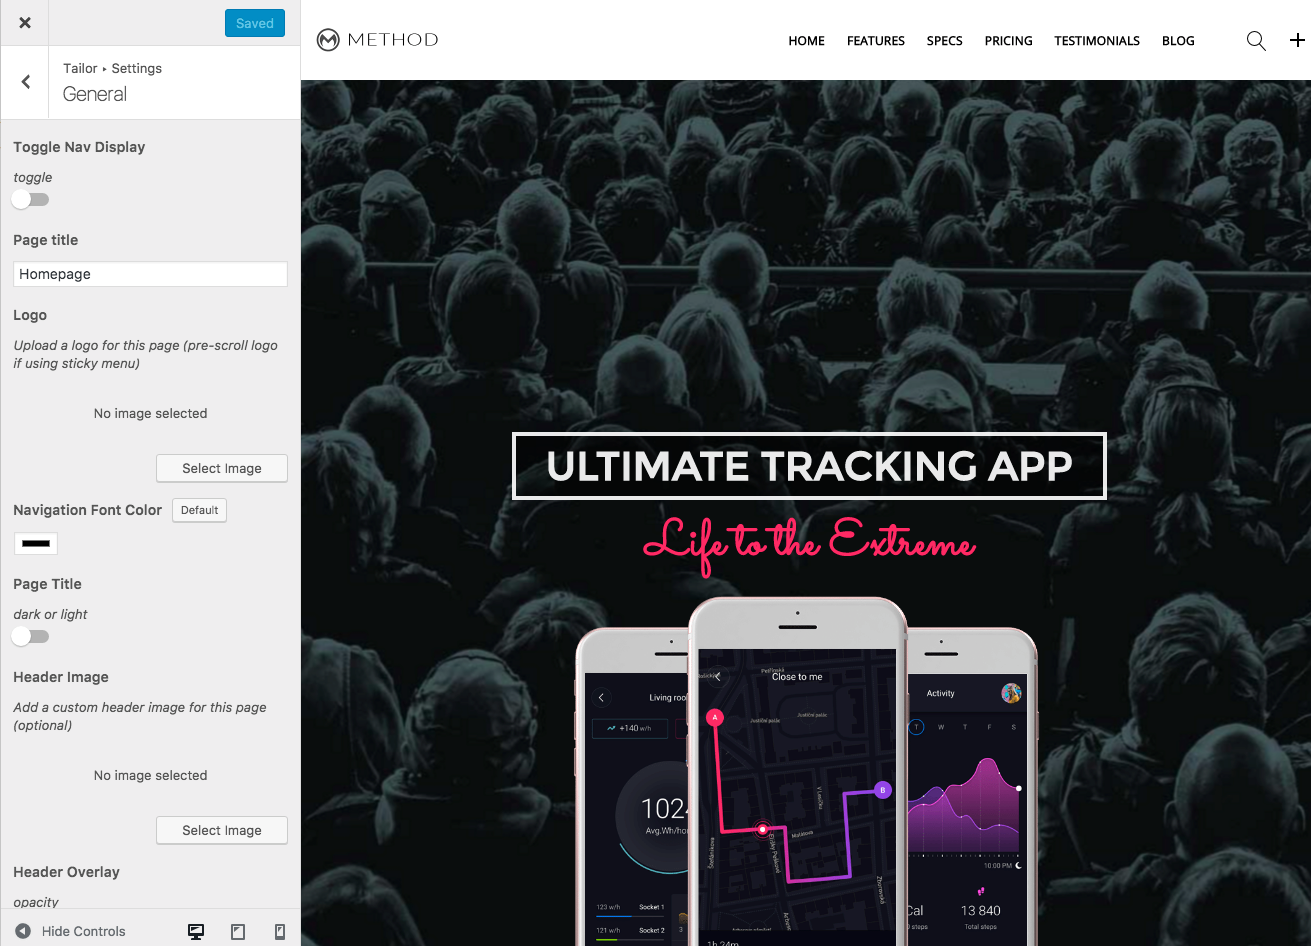
This theme includes many 'in-page' settings. While in the page builder you can click on 'settings/general' to access the page settings panel. From this panel you can overide site customizations such as the navigation color, logo and header image.
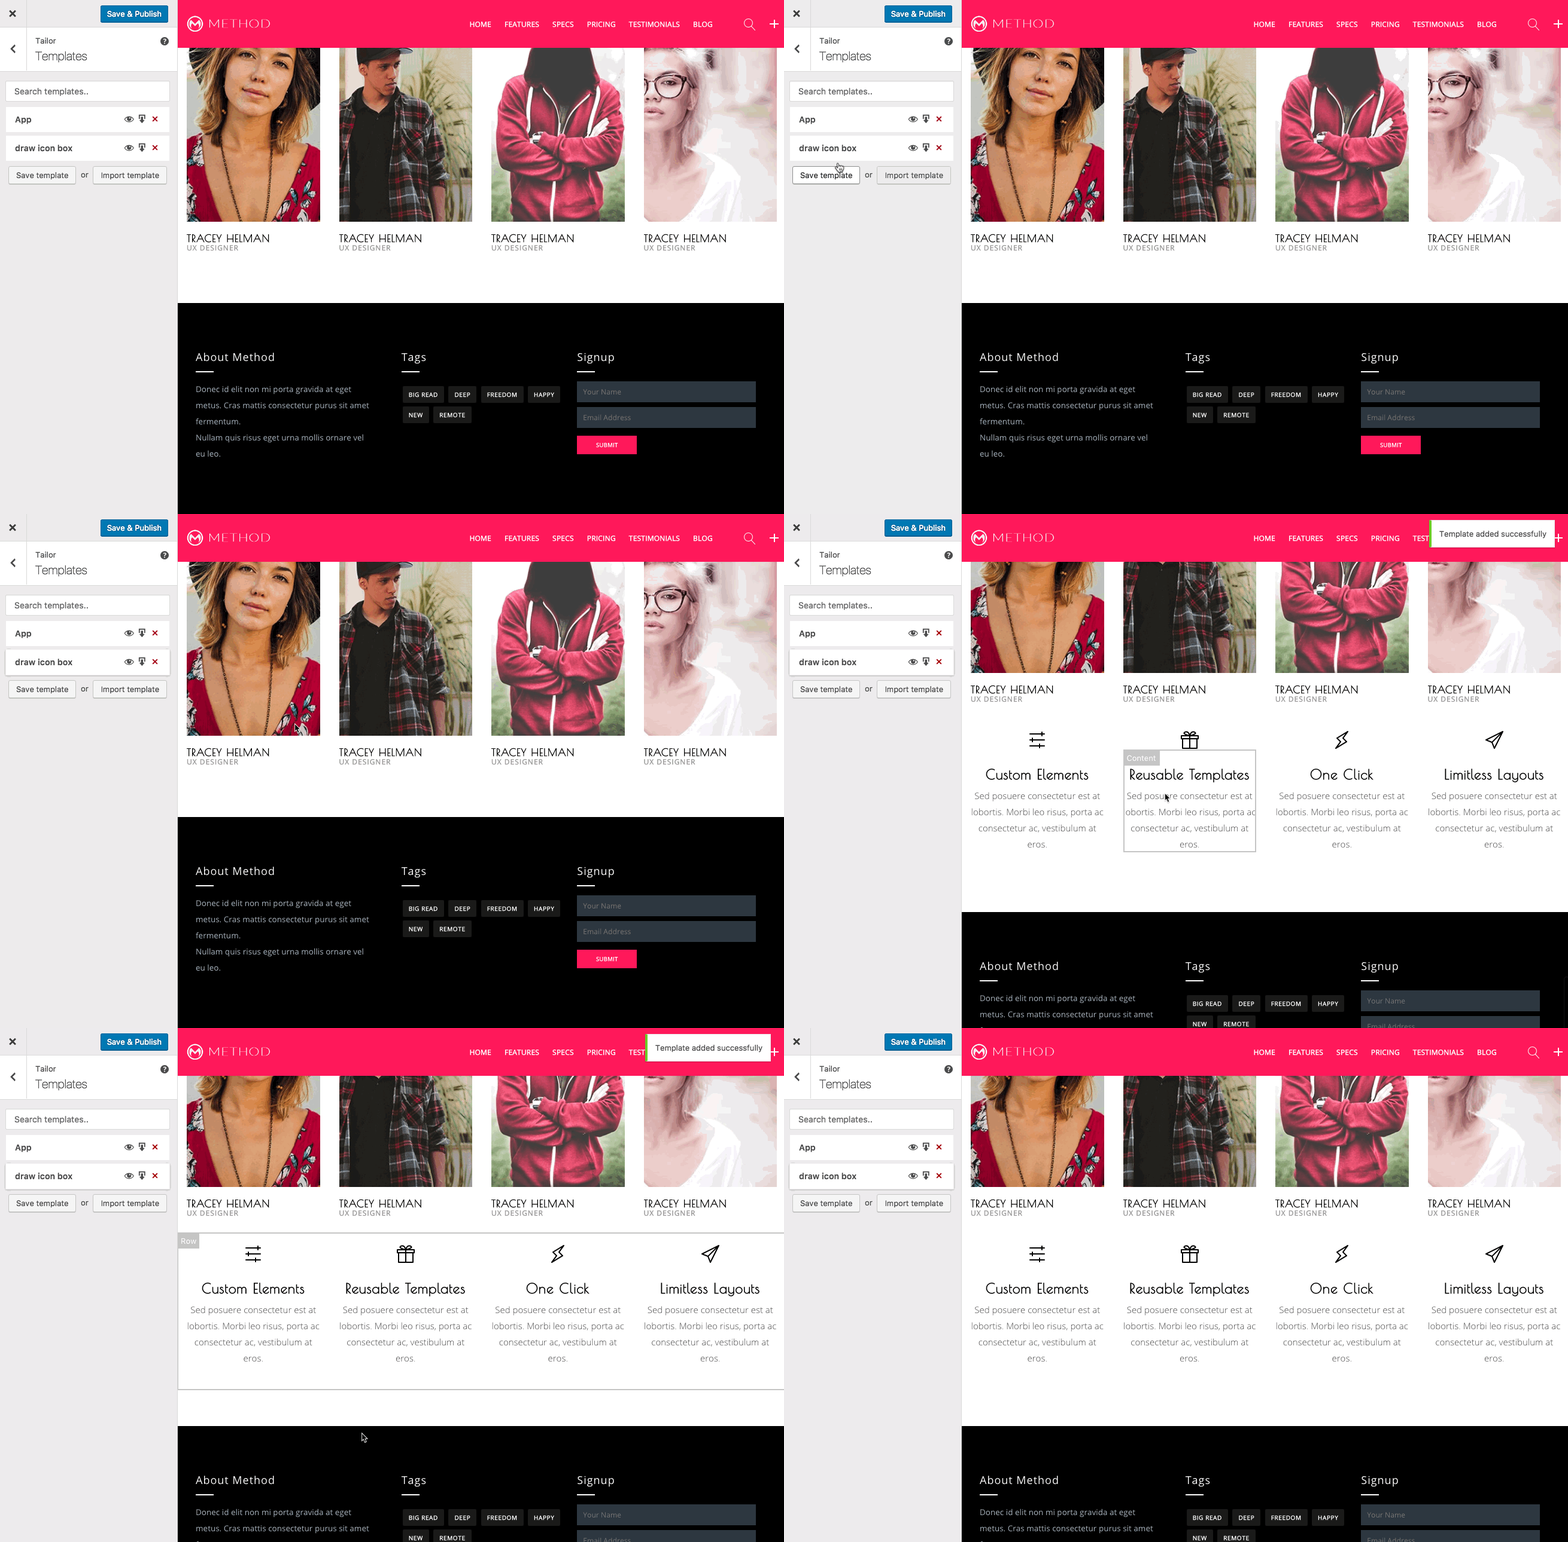
You can save sections of you design to reuse. Simply drag the template to the canvas. You can save and preview templates as well as download/upload templates.
Note: - For additional ducsomentation visit the Tailor getting started documentation.
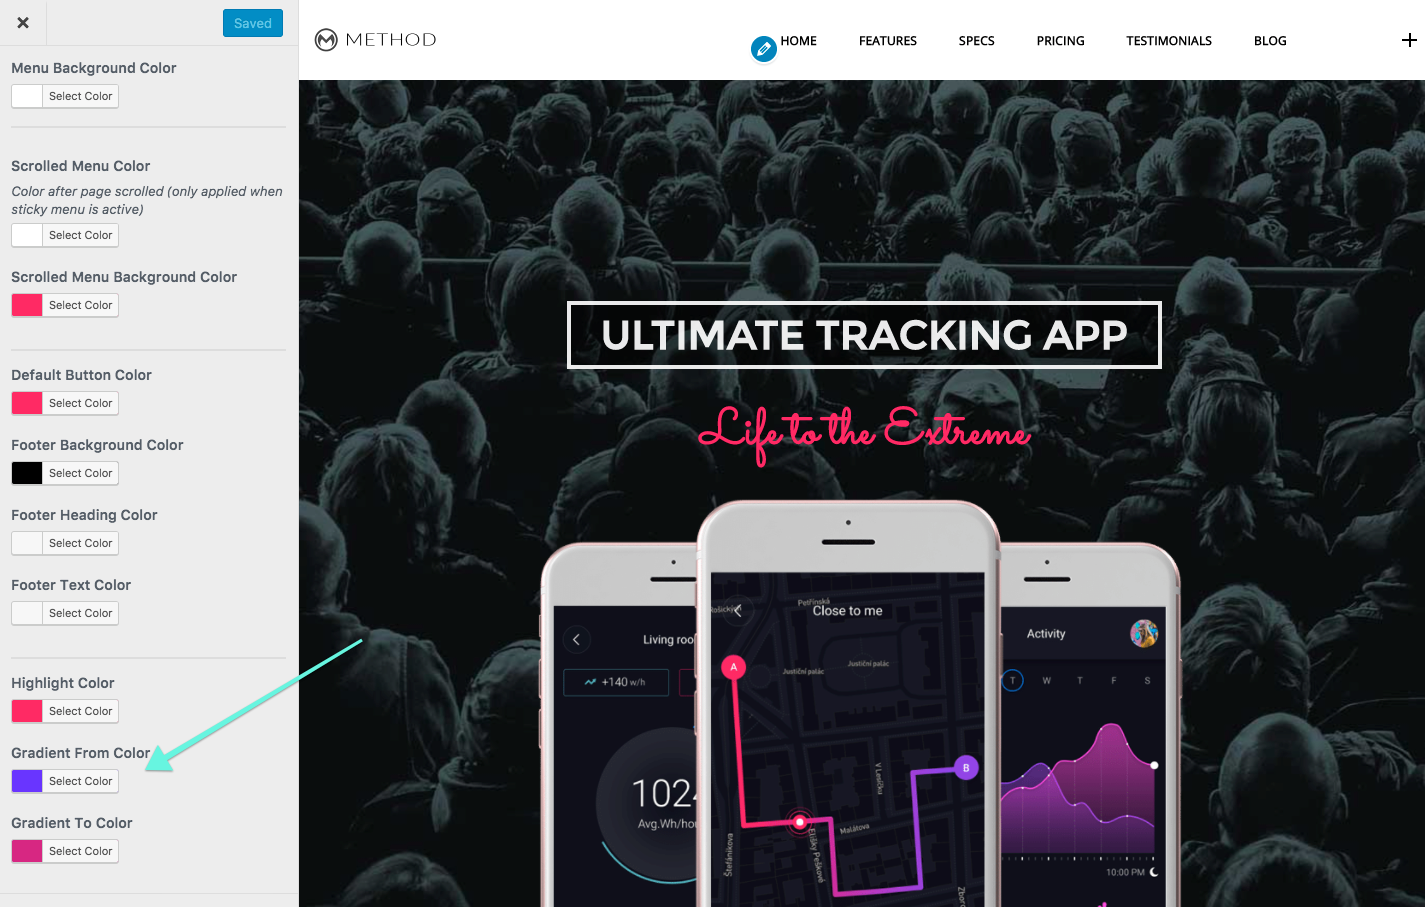
There are a few custom page builder elements that accept the gradient class.
You can set your site gradient in the theme customizer panel appearance/customize/colors
Elements with icons (excluding animated draw icons) can use gradients. Simply click on the element attributes tab and enter the class icon-gradient
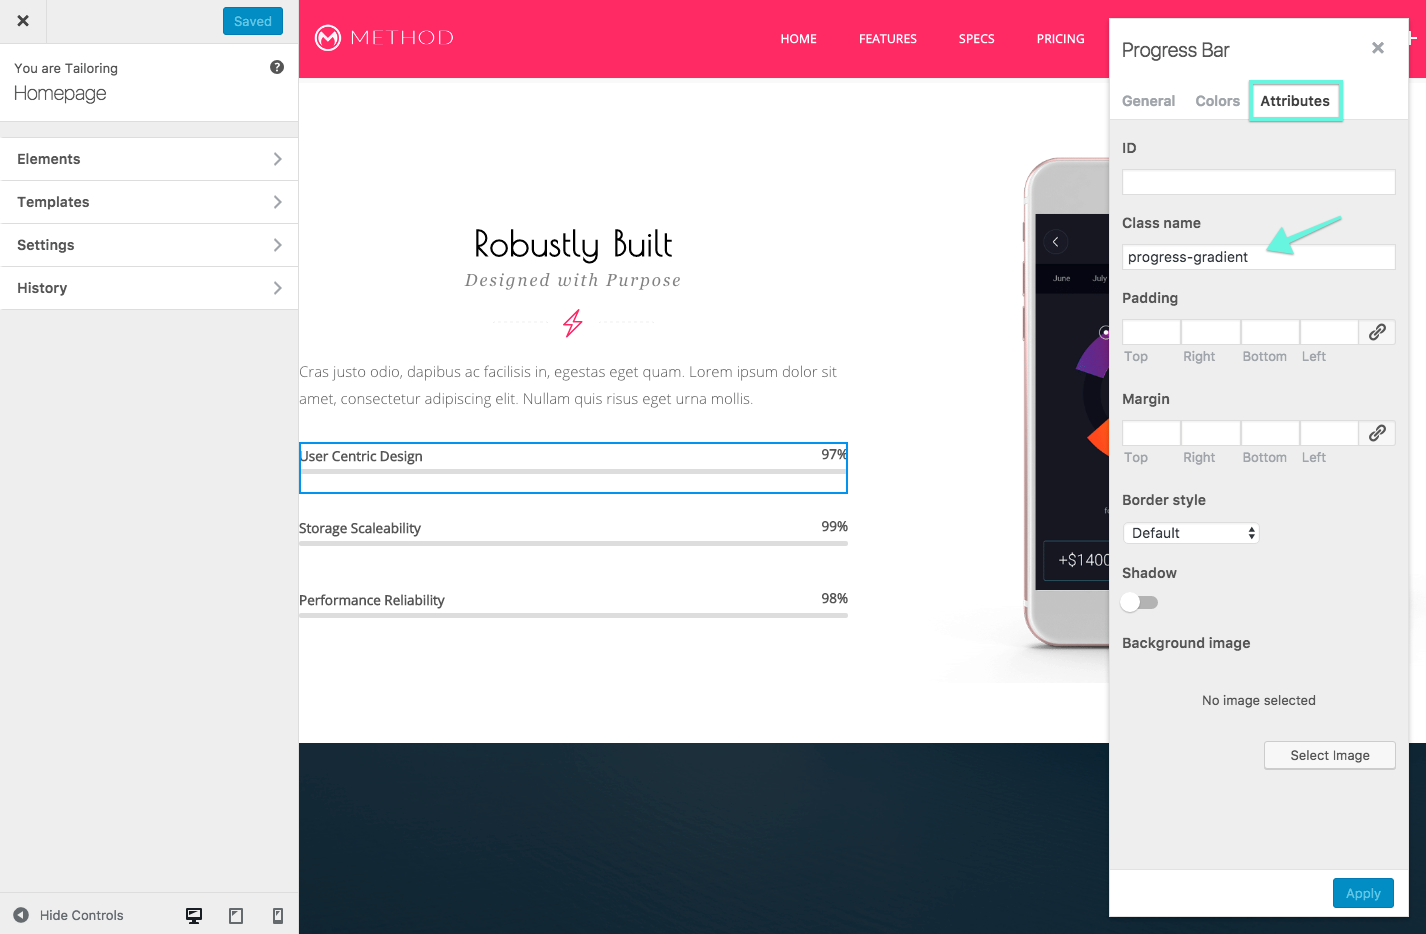
The Progress bar elements also accepts the gradient class. Click on the element attributes tab and enter the class progress-gradient
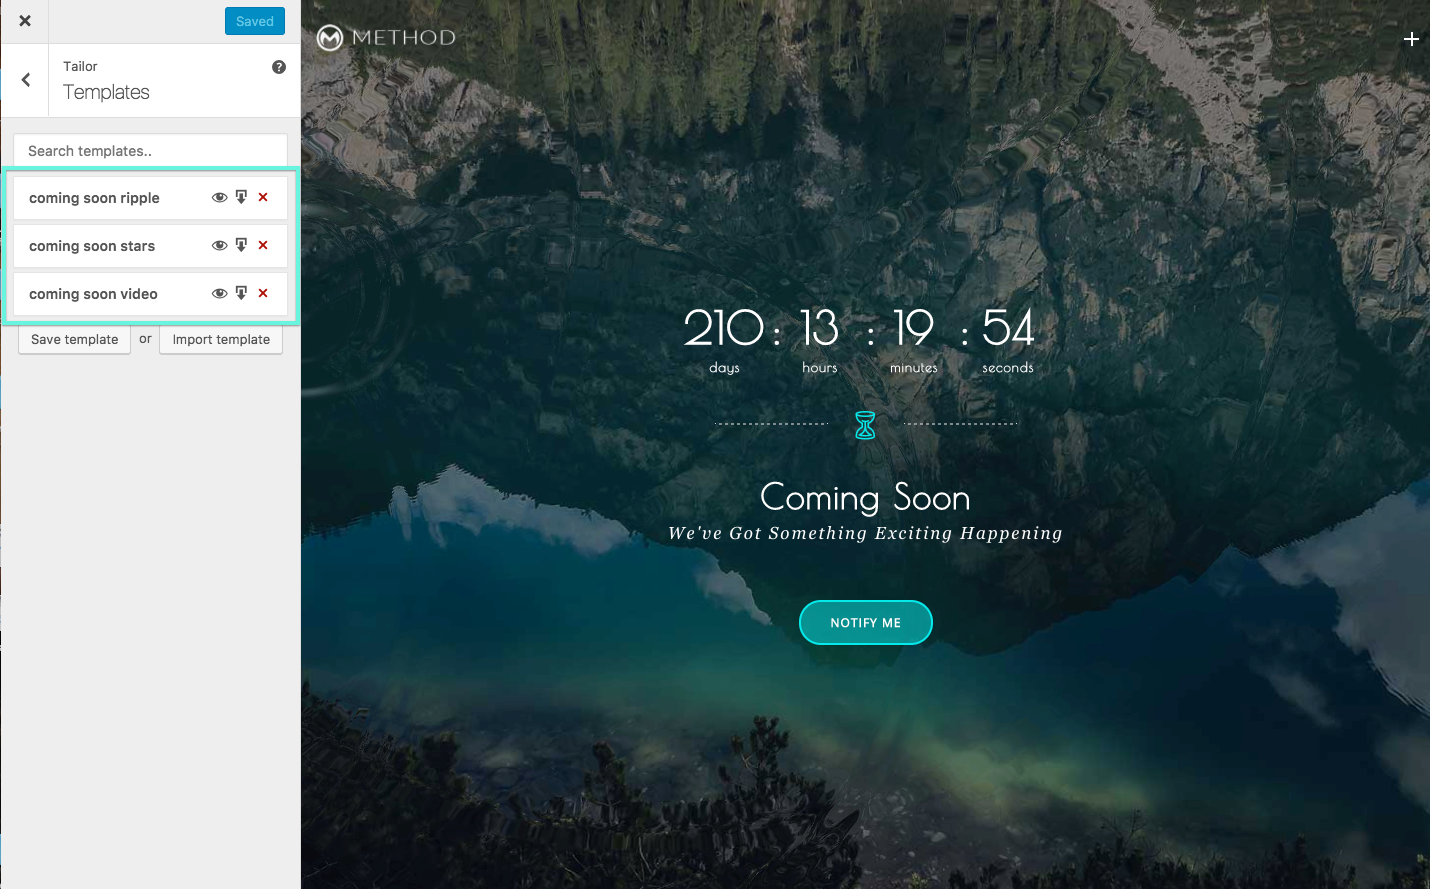
There are 3 preloaded coming soon pages. Or you can create your own.
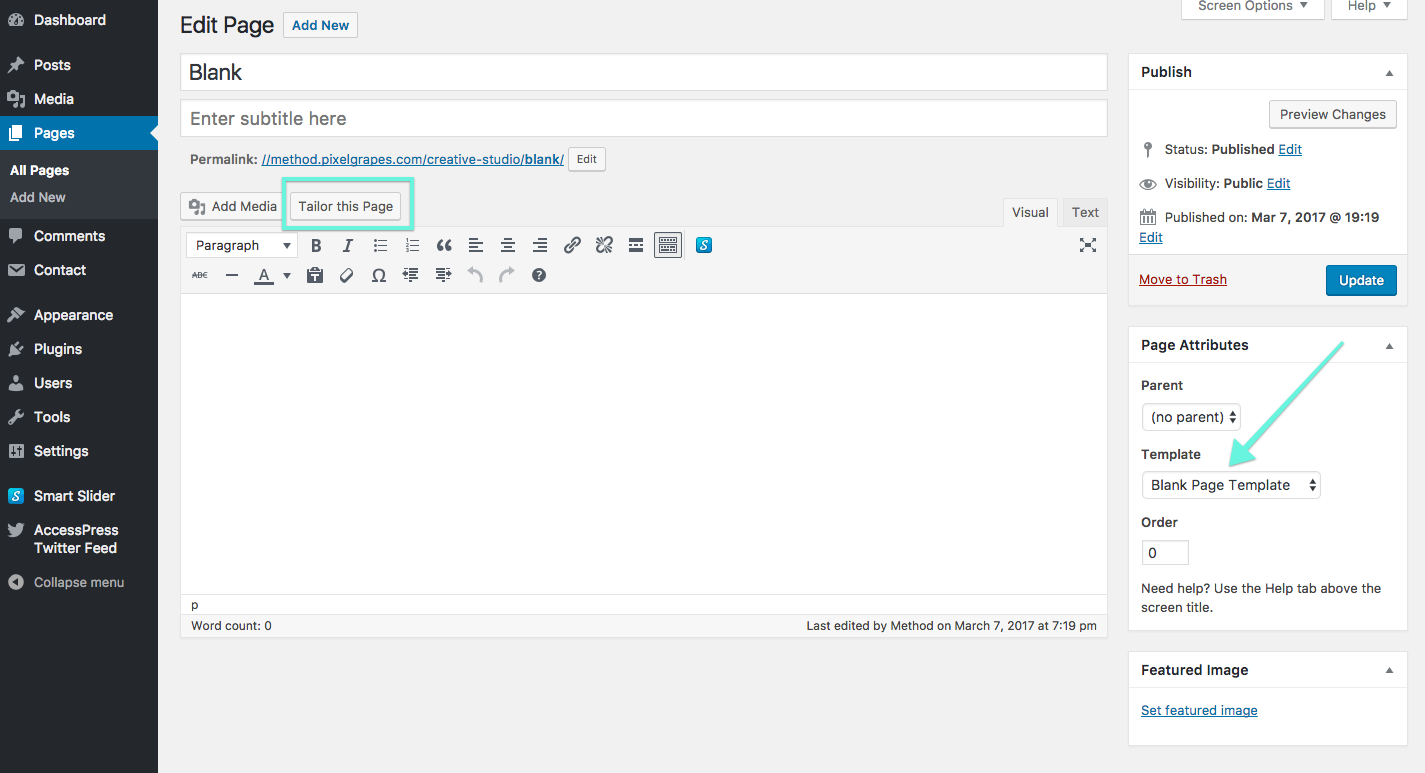
First create a new page using the blank page template and save it. Now select Tailor this Page
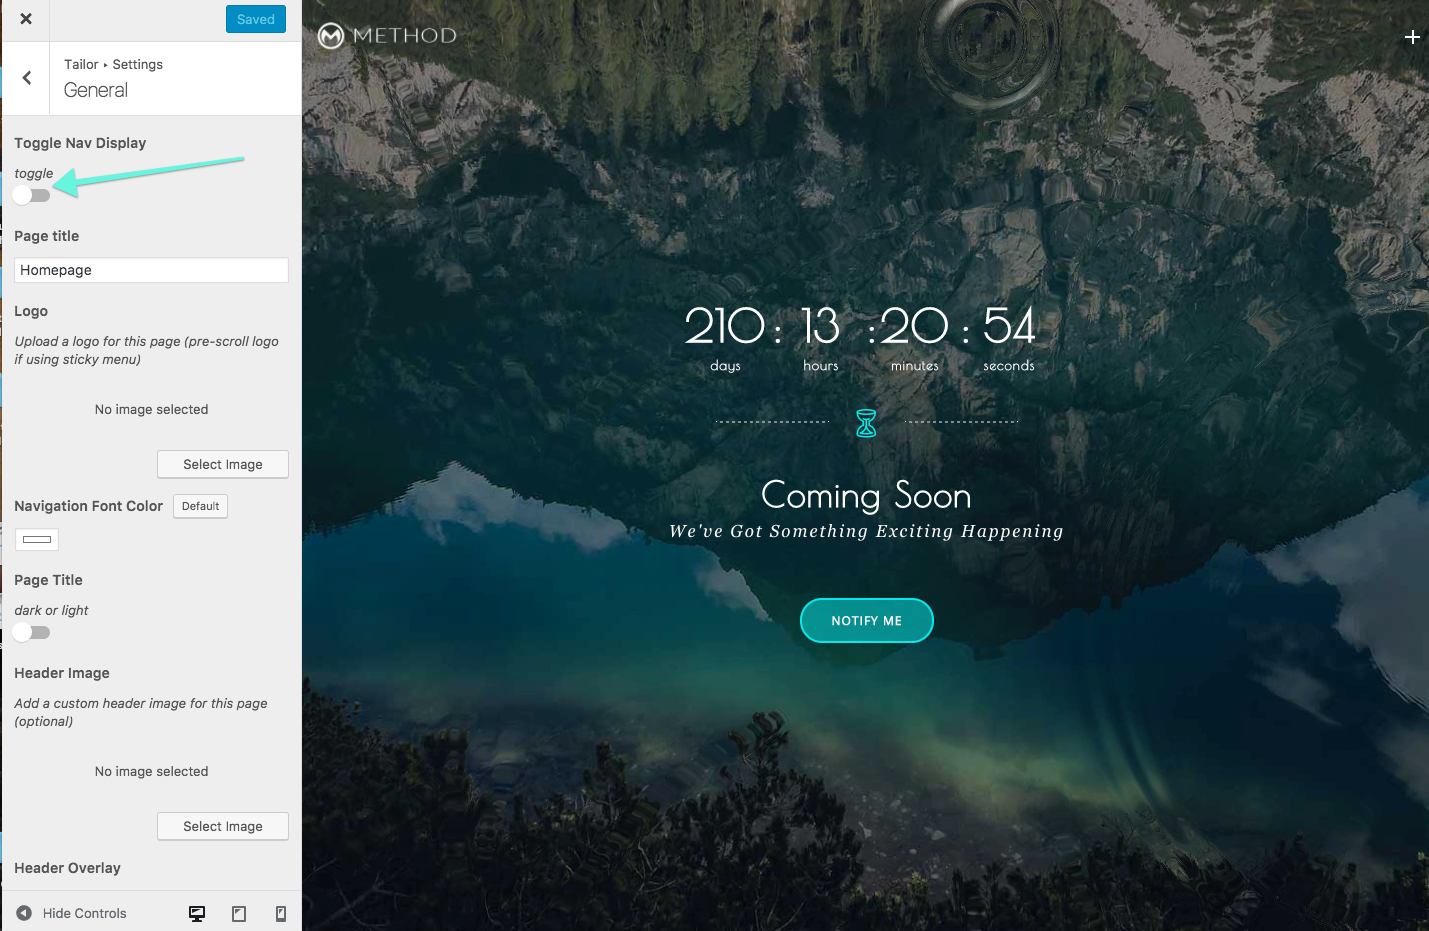
Now you can go to settings/general and toggle the Navigation and/or footer to display or hide.
Finally, go to templates and drag one of the templates to the canvas. Now you're ready to adjust text etc. as needed.
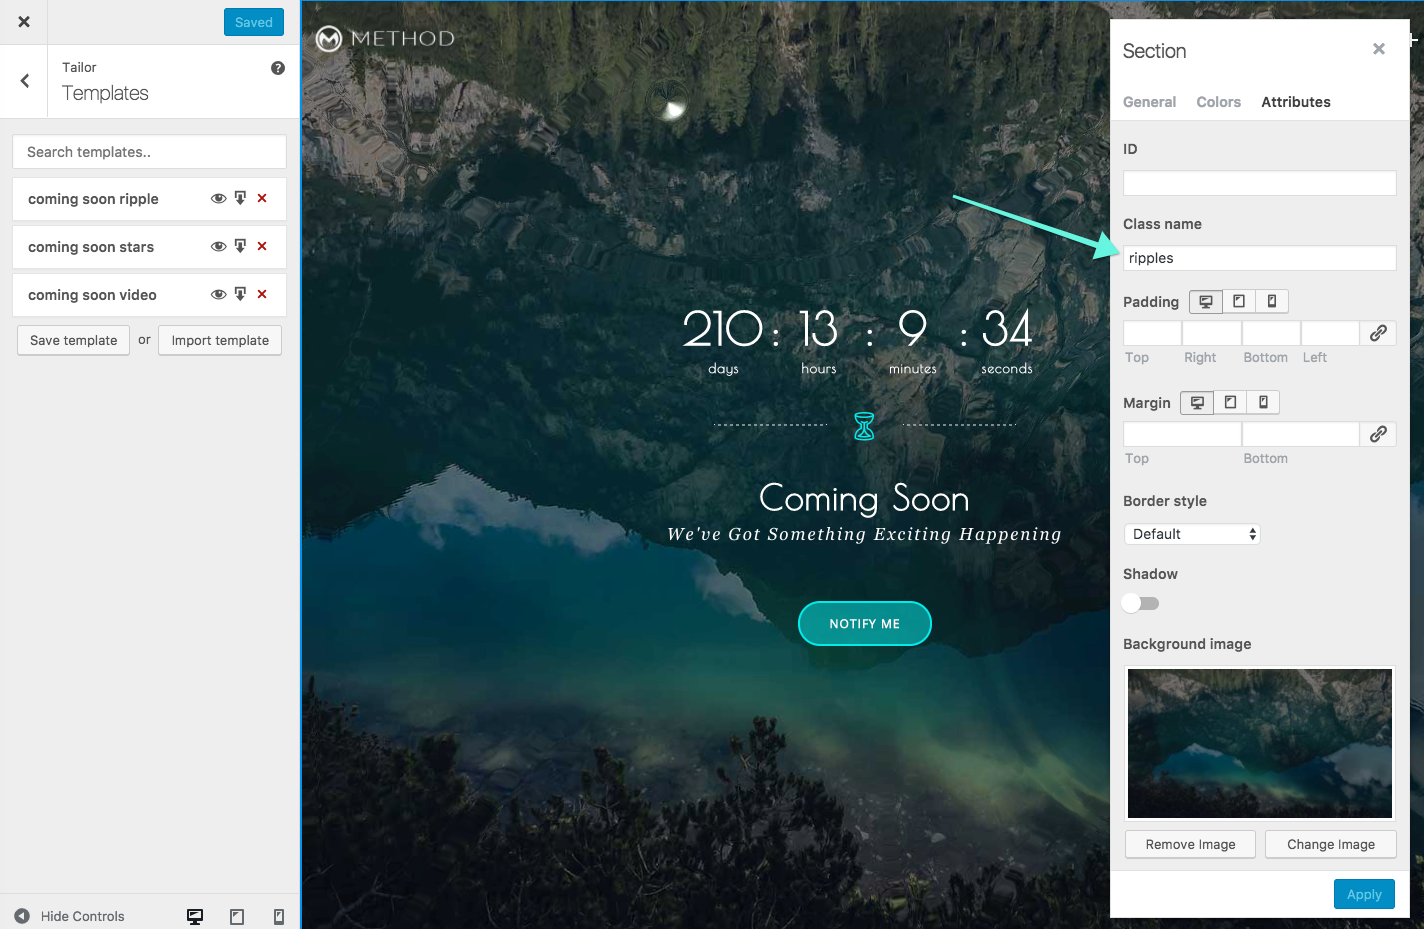
You can add the ripple effect to any section background image. In the element settings lick on the Attributes tab. Simply enter the class 'ripples'.
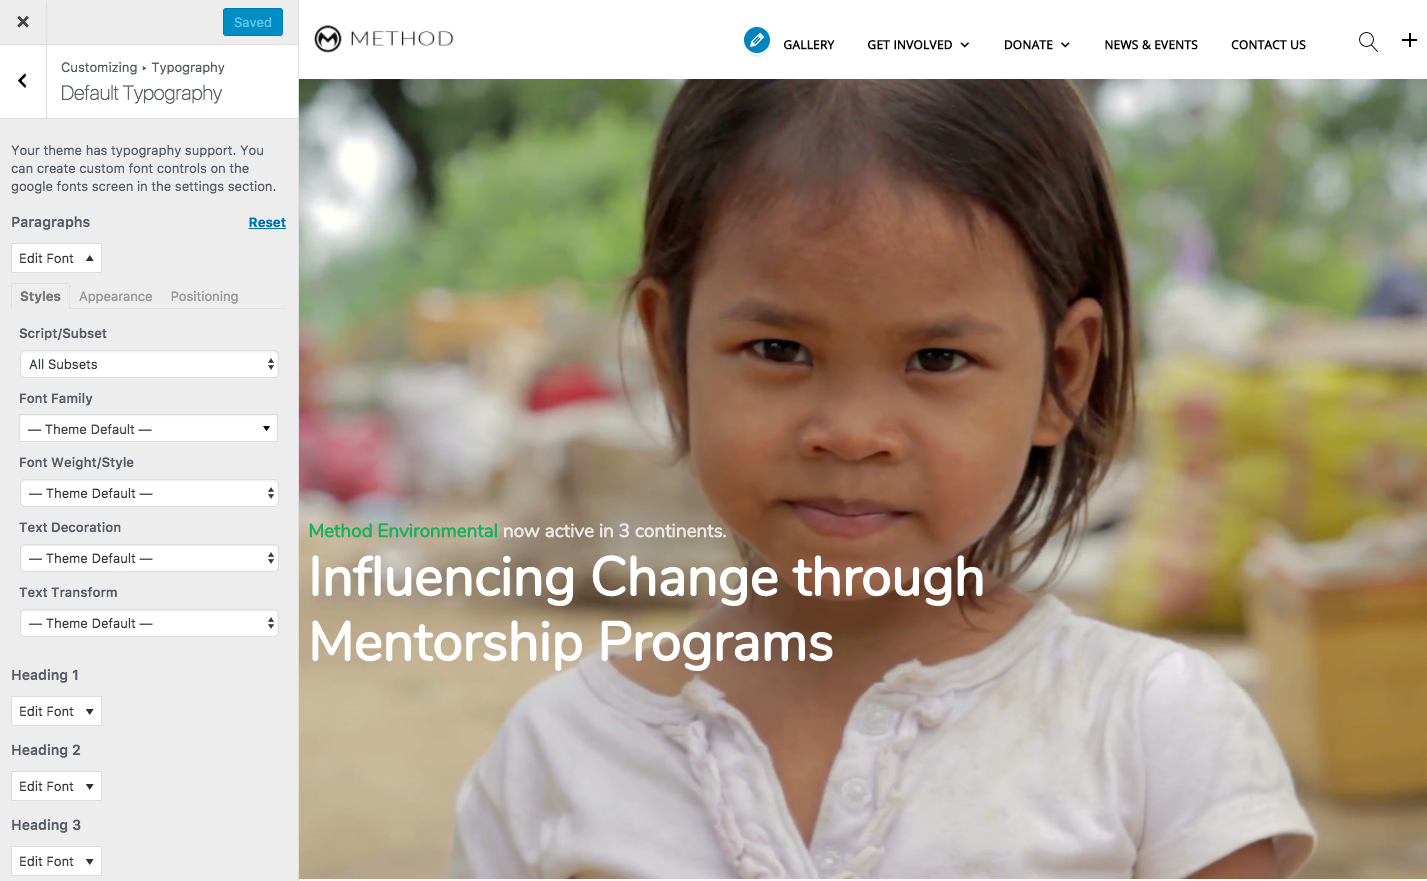
This theme couples well with the Easy Google Fonts plugin
You can change fonts in the theme customizer appearance/customize/typography
There are two options to add CSS to the theme.
appearance/customize/additional css to add your css.For additional support please visit theme support here.